Skip to content
Bringing Your Pastel Painting to Life
In the final stretch of any pastel painting, there’s a subtle but powerful transformation that happens when finishing a pastel painting. The photo above shows my finished pastel painting “Just a Little Checkup” on the easel, side-by-side with the reference photo I used to create it. Seeing the comparison reminds me just how important the final details are—those last adjustments in value, color, and contrast that truly bring the piece to life. Once the major features are complete and the composition feels solid, it’s time to shift gears—refining the piece with a careful eye for depth, clarity, and harmony.
For me, finishing a pastel painting means evaluating it from top to bottom, often with fresh eyes after a short break. I’ll prop it up on an easel across the room. Walking away and returning helps me spot what still feels “off” or unfinished. This isn’t just about seeing flaws—it’s about seeing where the energy or balance may be lacking.
Darkening the Darks and Freshening the Highlights
One of the most important steps in finishing a pastel painting is deepening the dark values. No matter how carefully I’ve layered my colors earlier in the process, I nearly always find that shadows need a final pass. Strengthening those darkest areas—like the inside of a nostril, the underside of a jawline, or the crease of a denim fold—adds depth and helps create a convincing three-dimensional effect.
Just as important is brightening or refreshing the highlights. Sunlight reflecting off hair, fur, fabric, or metal often needs to be strengthened with a final layer of clean pastel. I try to preserve the brightest highlights until the end so they’re crisp and vibrant—not muddied by blending or overworking.
Key Finishing Steps to Bring Your Pastel Painting to Life:
Darken the shadows: Focus on deepening dark areas (e.g., nostrils, under jawlines) for more dimension.
Freshen the highlights: Revive areas with strong light, such as fur, fabric, or reflections, for added vibrancy.
Refine details: Add delicate features like whiskers, eyelashes, and fine textures to make your subject come alive.
Step back and evaluate: After completing the details, take a break and look at your painting from a distance to spot any areas that need further adjustment.
Use a light fixative: Protect the pastel layers without over-spraying to lock in the details and prevent smudging.
Adding the Final Details
This is when I slow way down. Tiny features like whiskers, eyelashes, or bits of mane or tail are best added at this stage, when the rest of the piece is already built up and stable. Because pastel pencils don’t erase easily once the tooth of the board is filled, I want to be absolutely sure of these additions. I’ll often test a mark on scrap Pastelbord before adding it to the actual piece.
I’ll also clean up any unintended smudges and refine edges where needed. Sometimes this means using a kneaded eraser to lift stray pastel from the background, or sharpening a pencil to thread in a crisp line where edges have gone soft.
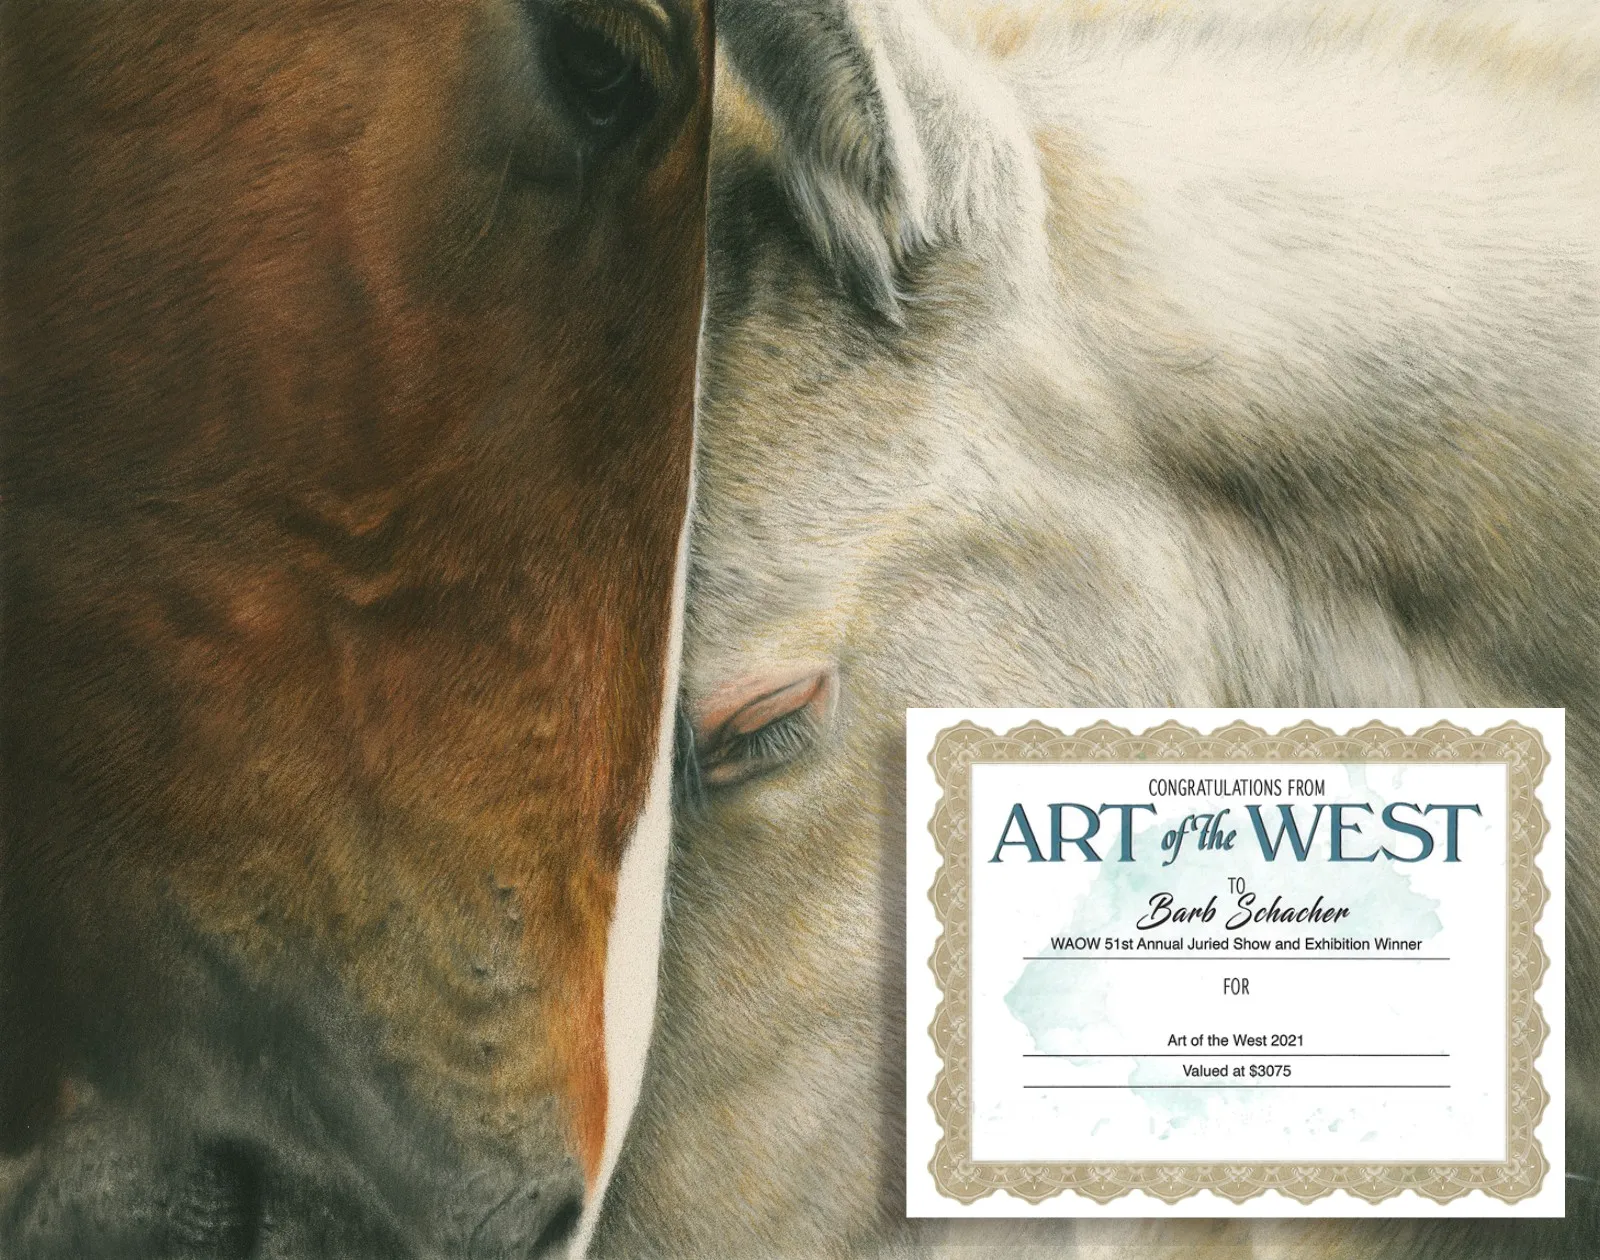
To illustrate how these final steps come together, here’s a detail from my pastel painting “Sweet Mama’s Girl,” featuring a mare and foal. This section shows exactly the kind of finishing touches I focus on at the end.
In this close-up, the nostrils are deepened to add shape and realism, while fine white whiskers are refreshed to bring delicacy and lightness to the muzzle. Shadowed areas under the jaw and chest are carefully darkened to anchor the subjects, and highlights where sunlight touches the horses’ coats are enhanced to give them warmth and life.
In this close-up, the nostrils are deepened to add shape and realism, while fine white whiskers are refreshed to bring delicacy and lightness to the muzzle. Shadowed areas under the jaw and chest are carefully darkened to anchor the subjects, and highlights where sunlight touches the mare and foals’ coats are enhanced to give them warmth and life.

This balance—between pushing the darks and brightening the lights—is what gives the piece dimension and character. Without these final touches, even the most accurate painting can fall flat.
The Last Step: Light Fixative
Once I’m confident everything is where it should be, I give the piece a very light spray of fixative. This isn’t meant to lock everything in like a varnish—it’s just enough to help prevent smudging and hold delicate surface marks in place.
After that, I let the painting sit overnight. If it still looks good in the morning, I’ll sign it and call it done. If I spot something that just doesn’t look quite the way I want it to, after spending a little time away from the painting, I’ll make the adjustments with pastel until I’m satisfied, apply another light coat or two of fixative to the entire painting and let it dry again before signing the piece.
Using Fixative in the Final Stages: Less is More
Throughout the final stages, I sometimes give the piece—or just a specific area—a very light coat of fixative. This helps the pastel “stay put,” especially in spots where multiple layers are stacked. In addition to setting the pastel, fixative can also add a little tooth back into the surface if it’s been worked heavily and is no longer gripping the pastel well. It can make just enough difference to finish those final details without smearing.
That said, fixative should always be used with a light hand. Heavy applications can cause an uneven shine or glare that detracts from the look of the finished piece. It’s far better to use several light passes than to overdo it in one go. If you feel more is needed, let the first layer dry completely before applying another. Patience and restraint are key.
Workable vs. Final Fixative
It’s important to use the correct type of fixative depending on your stage in the painting process. A workable fixative allows you to continue layering pastel over it without disturbing the existing layers—perfect for when you’re still refining a piece. On the other hand, final fixative is meant to preserve the finished artwork. It’s a non-reversible layer that locks in the pastels, so it’s essential to wait until your piece is truly complete before applying it.
Final Thoughts: When Is a Painting Really Finished?
Finishing a pastel painting isn’t just about knowing when to stop—it’s about listening to the piece. I slow down, look closely, and trust my instincts. That final round of detail, contrast, and subtle adjustment is what transforms a good painting into one that feels truly alive.
Every pastel has a rhythm to it, and each one teaches me something new. By the time I reach this final stage, I’ve spent dozens of hours with the subject. Honoring that effort with patience and care is what allows the artwork to shine.
Frequently Asked Questions
Q: How do you know when your pastel painting is finished?
A: I trust my eyes and instincts—but I also let the piece sit overnight. If it still looks complete in the morning, I’ll sign it and call it done. Final steps often include deepening shadows, brightening highlights, and refining tiny details like whiskers or edges.
Q: Why do you use fixative, and when do you apply it?
A: I apply a light coat of fixative near the end of the process to help pastel layers stay in place or to restore a bit of tooth when layering becomes difficult. I’m careful to use only thin layers, as thick spraying can cause an uneven shine that’s hard to correct.
Q: How long does it take to complete one of your pastel paintings?
A: It really depends on the size, the level of detail, and how complex the background is. A highly detailed subject with a realistic background takes much longer than one with a simple blurred backdrop. No matter the piece, I put in a lot of time because capturing fine details is what brings the artwork to life.
Q: Why do you use pastel pencils instead of soft pastels?
A: I use pastel pencils exclusively because they allow me to capture the fine details that define my style—like the texture of denim, the shine of a horse’s coat, or the curve of a delicate eyelash. Soft pastels are beautiful but can be too broad for the kind of precision I aim for in my Western-themed work.
Q: Do you accept commission work, like horse portraits?
A: I occasionally accept commission work, especially if it’s a subject close to my heart—like horses. If you’re interested in a custom pastel portrait and the timing and budget are a good fit, feel free to contact me to discuss details.
Q: Where can I see or purchase your original artwork?
A: You can view available originals and limited edition prints in my Online Shop. New work is added regularly, and collectors can also join my email list on my Barb’s Western Art Journal page for early access to artwork and show updates.
Want to read from the beginning of the series?